

I never thought I would be raising chickens! It started with my 9 year-old son (who isn't fond of school) suddenly becoming very passionate about farming. He even asked me if we could go to the library to get books on farming!! I was so happy that he was excited about something other than gaming. We decided to check out our local 4-H club, and that's where he came face to face with his new love...a Barred Plymouth Rock chicken. There were so many different projects there (coding, woodworking, electricity, shooting, art, goats even), but all he was interested in was that chicken. So that is where it all started - as a mom, we do whatever we need to do for our kids. For our family, that meant learning how to raise backyard chickens in a subdivision. Now you can learn from our experience on what you need to do to prepare for your new baby chicks.
1. Educate yourself
We went to the library and checked out several books on raising chickens. I told my kids that we needed to make sure we knew what we were getting into. The best book we read was called A Kid's Guide to Keeping Chickens by Melissa Caughgy. It has great information and is super simple to read and holds kids' attention.
2. Decide on what breed you'd like to raise
I am absolutely no chicken expert, just a mom on a mission. What I have learned is that you can get egg chickens, meat chickens, or hybrid (both). Our 4-H leader doesn't recommend meat chickens if you are new. He recommended bantams because they are smaller and simpler. We did a lot of research on breeds of chickens. My son chose the Barred Plymouth Rock (no surprise there) because he is focused on raising them for eggs. They lay about 250 eggs per year. My 11 year old daughter is all about the cuteness factor so she chose white silkies. These adorably, fluffy things do still lay eggs, but not as many and they are going to be small and blue! Because we live in the city in a small subdivision, we are only allowed 4 chickens, so went with 2 of each breed. The book I recommended will really help narrow down the breeds and the pros and cons of each. The ones we chose are very friendly and good with kids.
3. Find a reputable hatchery
We decided not to raise the chickens from eggs because then you don't know if you are getting hens or roosters. We are not allowed to have roosters in our city so that would have posed a problem. Instead, we went to My Pet Chicken and purchased 1 day old chicks. I liked this place best of all because you get to choose as little as 1 chick of your choice. Many other sites make you purchase large sets where My Pet Chicken let me choose 2 white silkies and 2 Plymouth Rock. Also, you can pay a little extra to have them sexed to make sure you get all hens. This was also very important to us. Another awesome thing about this site is that you get to choose a date for them to be shipped out. I guess this is based on when they know the chicks will hatch. We picked a date that was about 2 months out so that we would have time to prepare for them. Our 1 day old chicks were shipped out on a Monday and arrived on Tuesday via USPS. We had to go pick them up from the post office. We also learned from 4-H that not all places sell "show quality" chickens. Well, lucky for us, My Pet Chicken does and they even sent us the paperwork we need for the 4-H club. I highly recommend them, and no, they didn't pay me to write this. I have no affiliation with them at all.

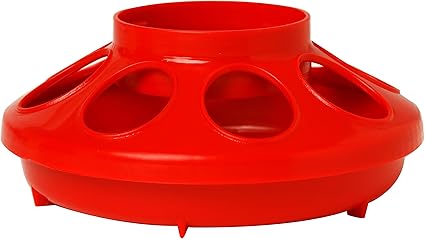
4. Gather supplies
In the beginning, you mainly need a brooding box, a heat source, bedding, food, a feeder, and a waterer. We made a brooding box out of a plastic tote, hardware cloth (which is the rolls of wire that's much stronger than chicken wire), and zipties. If you'd like to read the post on how we made it, click here. Here's a picture of the finished product. For the first week, you can place a piece of soft shelf liner on the bottom so that the chicks don't slip.

For the heat source, I decided to spend the extra money for the Brinsea EcoGlow. This is a radiant heater they hover under. It is much safer and energy efficient than heat lamps. It helped me sleep at night knowing I didn't have a fire hazard in my den. We bought a nipple waterer because I had read it's better for them once they are outside. The nipple waterers keep the water from being exposed to bacteria. We bought a regular mason jar feeder. I also read on a blog to put a feather duster in the brooder so they could go under it like a mama chicken, but our chicks never went under it so we took it out.


For food and water, we started our chicks on Scratch and Peck Feeds Organic Starter Mash Chick Feed. It's an organic, non-gmo product you can get on Amazon. We also bought baby chick electrolytes from Farm & Fleet to start them off. You just add it to their water.
5. Have a plan for a chicken coop
Once the chicks are six weeks old, they are able to transition outside. You won't need the chicken coop and chicken run right away, but definitely have a plan for it. To see what we did for our chicken coop, you can click here.
6. Start brainstorming names!
Here's another fun part. We were looking up names online from the day we ordered our chicks. My kids first focused on colors - my son's were going to be black and white striped, and my daughter's were going to be white fluff balls. We had lots of ideas, but decided to wait on their names until we met them so could make sure their names fit them.
So that is all! The hardest part about preparing for the chicks is the waiting. We were so excited for the date. Follow my blog for more updates and posts on our chicken experience.
